

Luckily, I don't set lofty and unattainable goals for myself or procrastinate ...
I just counted and I have 15 more days until Christmas. I'm counting today (thought it's after midnight and it really is tomorrow), because I will crochet until 5 a.m., as I have the past three nights in a row, and I'm counting Christmas Eve, because some of my presents won't be given until Christmas Day and last minute finishes can be done before or after the festivities.
Fortunately, and true to form, I decided to take the easy road and crochet handmade gifts for 12 people. Which really wouldn't be that many, if I had spent the whole year working on them -- that's only one per month. Actually, that line of reasoning doesn't make me feel any better.
I led this post off with a picture of my Christmas tree, which I felt some accomplishment in getting up the first weekend of December. The best part was I had help. Mommy came up, and in festive tradition, we listened to the Carpenter's Christmas album while trimming my tree.
My favorite part is the bows:

I was going to buy bows, but I decided that, with Mommy's crafty genius close at hand, we could make them. So, we started with a spool of ribbon and a package of ornament hooks.
With her uncanny mind for working things out, Mommy realized that if she cut the ribbon to a point in the middle at the ends ...

the next could be cut to two points at the ends, eliminating any waste of ribbon.

Step 1: Once your ribbon is cut, fold it in half over your index finger.

Unfortunately, I had to use myself as a hand model, so these pictures are full of my crazy witch fingers. If you can avoid being distracted by how ugly my hands are, read on …
Step 2: Twist the ribbon once. This will make a loop around your finger that will become the center of the bow. Hold onto the twisted material with your thumb. This is the back of the bow, where all the pieces will come together.

When I learned how to tie my shoes, my parents told me to make two "bunny ears" and then tie those in a knot. I think the bunny ears idea is helpful here.
Step 3: Take one of the ends of the ribbon and, to one side of the center of the bow, make a bunny ear with the nice side of the ribbon facing out. This will form the first side of the bow. Make sure to leave enough of the end hanging down for the bow's tail. Where this half of the bow meets the back, twist the tail so that its nice side is facing out also.

Step 4: Pull the tail of the first bunny ear down, so you have room to make the second. With the remaining half of the ribbon, fold it into the second bunny ear, meeting at the center and leaving a tail. Twist this tail, also, so the nice side is facing out.


Step 5: Still holding with your thumb, feed the end of the ornament hook in between the back of your index finger and all the layers of ribbon.

Step 6: Fold the ornament hook up and wrap the end (that normally secures the ornaments to the hook) around the top of the hook. Tighten everything up by pulling up on the top of the ornament hook and squishing all the pieces together.
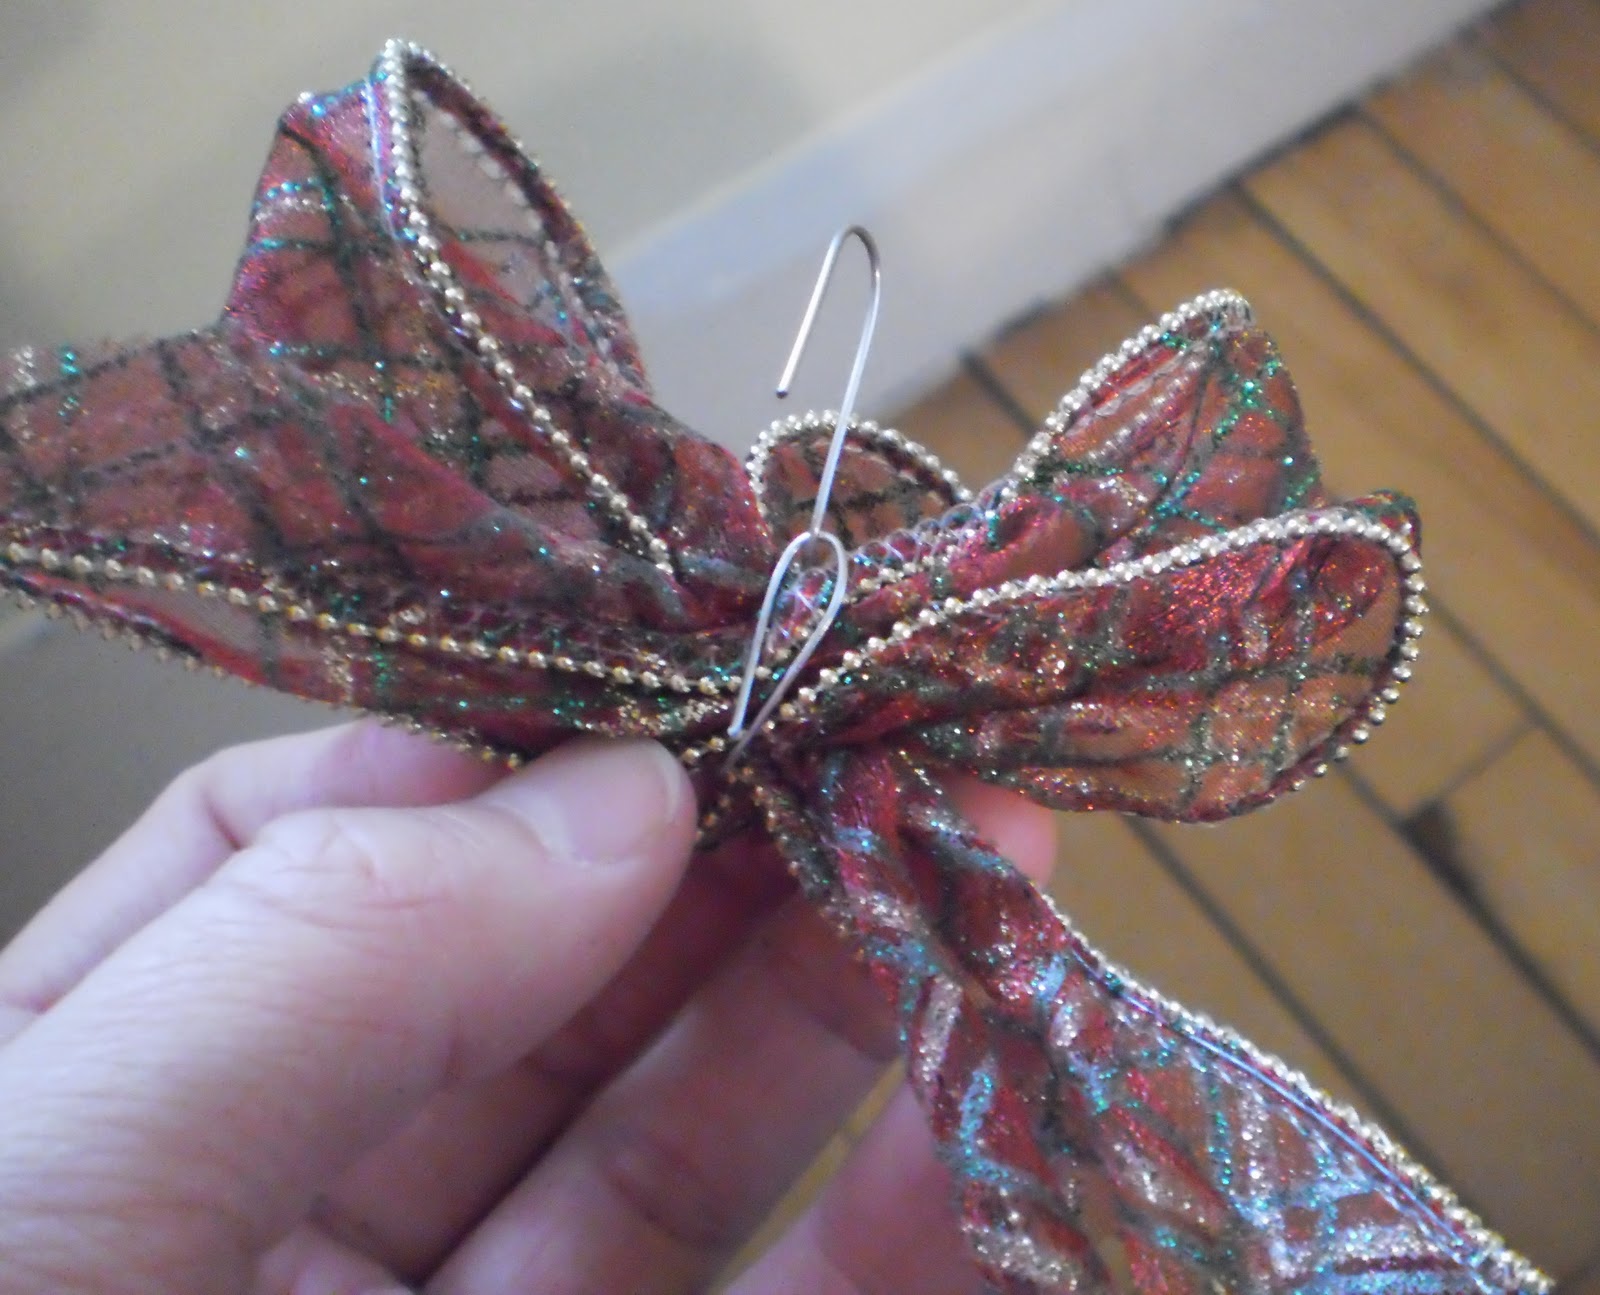
Step 7: Your bow is going to look a little bit wonky …

so fiddle with it until it looks pretty.

The beauty of using the ornament hooks is, you can twist the top of the hook to the side and it's ready to put on the tree. Also, they are very easy to manipulate. If you don't want to hang your bows on the tree, just use the cutty part of needle-nose pliers to cut off the end of the hook, and fold any pokey edges in behind the center loop. (I really hope no one is confused by the technical jargon I use.)
It was kind of providence that we decided to use the hooks. We originally searched high and low at Kmart to find the spools of twist-tie like stuff, but to no avail. Then, Mommy had the genius idea of using the ornament hooks. She's super handy.
I hope this helps. I think these bows ended up tons cuter than the bows that were already made that I was going to buy. And I got about 15 bows out of one spool of ribbon.
Good luck to the rest of you procrastinators out there. I hope your Merry Christmas Crafting is going much more quickly than mine. But, I'll keep you apprised of how it goes. Right now, I'm working on one of many stuffed animals I hope to make, but it's slow and each night I think I'm going to get so much more done than I do.
I'm off to work my ugly witch fingers to the bone.
Thankyou :)) for sharing your talent :))
ReplyDelete